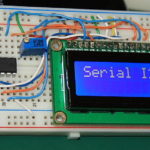
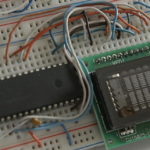
Serial LCD Interface I2C
Interfacing LCD Display with serial Interface like I2C can save microcontroller I/O making it a practical alternative to a standard parallel 8 bit interface. We’ll use PCF8574 I2C port expander and PIC16F876A microcontroller to establish IIC communication by 2 lines, ...
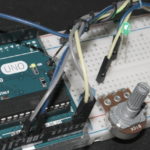
Photoresistor Light Sensor Arduino
A simple light sensor can be built using a photoresistor and Arduino UNO board. Similar design is available here. This design requires only a few additional components like 10k resistor and a 10k potentiometer to adjust the light intensity level ...
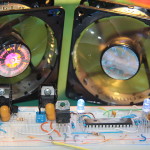
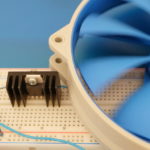
2 Channel PC Fan Controller
Following recently published article about building a PWM Fan Controller here is another simple controller design. This time it’s a 2 Channel PC Fan Controller for standard 12V Fans. It uses software implementation of PWM but instead of directly driving PWM ...

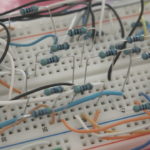
Running LED with PIC16F877A
In this post I'll show a simple running LED circuit. Currently only 2 patterns are available but additional effects can be easily added by slightly modifying the code. This design uses only 16 LED's however PIC16F877 has 5 I/O ports ...
Controlling PWM Fan with PIC16F684
In this post I’d like to share a design of PWM Fan controller based on PIC16F684 MCU. For Arduino version click here. Previously I’ve designed similar circuits some of them more complex than this one. I recommend you to look ...
Bargraph Voltmeter
A simple bargraph voltmeter can be built using 2x16 LCD or compatible VFD display. For Arduino version click here. This design utilizes PIC16F877 microcontroller and its ADC block to convert 0 – 5V input voltage to a binary number shown ...
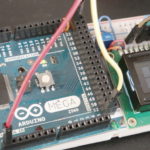
Arduino Thermometer LM35
LM35 is a temperature sensor that outputs a voltage proportional to the surrounding temperature in centigrade. In this post I’ll show how this device can be connected to Arduino MEGA board to build a thermometer that shows the current temperature ...
Alphanumeric Display Driver
In this post I’ll show how a single alphanumeric display can be driven by PIC16f877A micro controller. There are dedicated IC’s for this purpose however a micro-controller can be programmed to perform this task. By using a microcontroller you'll get a ...
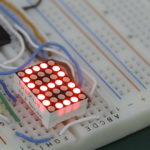
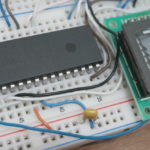
7×5 Dot Matrix Character Generator
In this post a basic character generator design based on PIC16F88 will be demonstrated. 7x5 Dot Matrix Display was used and its pin out is shown in the schematic below. Instead of using PIC16F876/7 microcontrollers PIC16F88 was chosen for this purpose ...
Digital Voltmeter VFD Display
This is a new revision of 10 bit Digital Voltmeter. For Arduino based voltmeter click here. Recently I’ve published a few voltmeter designs ranging from a simple LED display voltmeters with 8 bit of resolution to a more complex with 10bit ...